(Last Updated On: February 24, 2018)
You may have piles of documents that are scanned PDFs or images. They are good, because you turn documents and papers into digital form and archive tons of paper into your hard disk. You win the “paper-free” office prize. However, it will be bad news if your boss asks you to search content stored away inside one scanned document. It is also annoying if you need to copy and paste the text from images. Try to retype it and get another copy by yourself? That will be the last choice.
Thanks to evolution in technology, it is possible now to digitize these documents. The OCR has come to our rescue. OCR (Optical Character Recognition) is a revolutionary technology that recognizes the printed, handwritten, and typewritten text in scanned PDFs or images and translates it into a form that the computer understands. Therefore, all you need to do is to find a piece of free OCR software, which enables you to edit, copy, paste and search the text within scanned PDFs or images.
Here you are recommended All PDF Converter Pro. It is one of the few converters that authentically turns a scanned PDF or image to an editable text on Windows systems. Its inbuilt leading-edge OCR makes it possible to automatically detect and recognize the text data shaped in scanned PDFs or images. What’s more, its robust engine ensures performing quick on-the-fly and fluid batch conversions. In this today’s tutorial, you will learn how to perform OCR to convert scanned PDFs or images into text files with All PDF Converter Pro.
Part 1. How to OCR scanned Adobe PDF for free.
To get a free copy of All PDF Converter Pro, free download this best OCR software by clicking on the download button.

After downloading, install the software and run this OCR program.
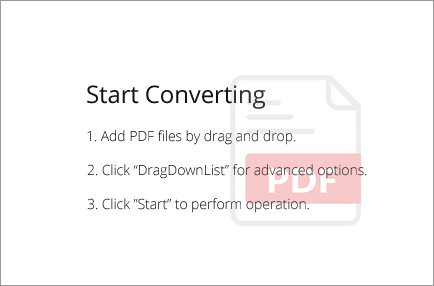
Follow the 4 steps below to add PDF file, configure options, set output path and OCR PDF to text.
Step 1. Add PDF File.
There are two ways to add file for your choice.
1. Click on “Add Files” to add the scanned PDF file into the program.
Tip: You can add as many PDF files as you like into the program.
![]()
2. Drag and drop the PDF file into the program.
Tip: You can drag and drop multiple files or a folder into the program.
Once files added, they will appear in the main window.
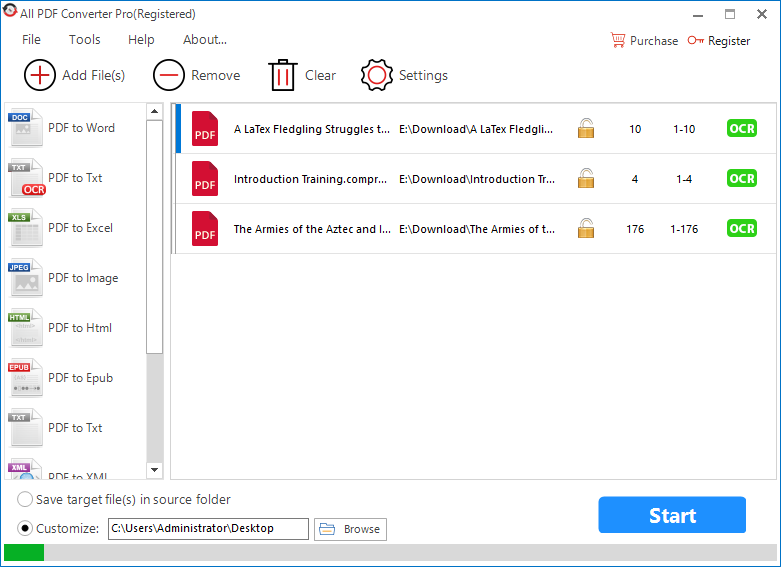
Step 2. Configure Options.
First, select “PDF to TXT” with OCR tag on left panel.

Tip: If the added files are detected as scanned PDFs, OCR tags will turn green to red.

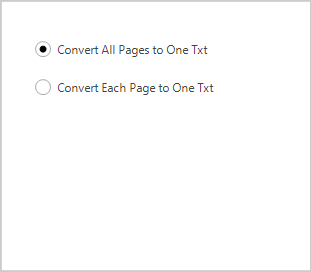
Second, click on “Settings”, then select “TXT”, and you will see two output modes.

You can turn all pages of PDF into a single text file by selecting “Convert All Pages to One Txt”.
You also can extract each page and export it to an individual text file by selecting “Convert Each Page to One Txt”.
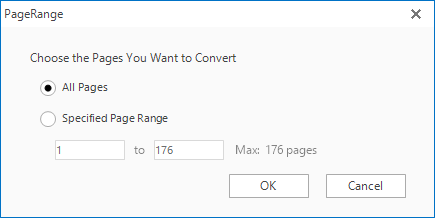
Third, define page range. Right-click on the added file, then select “Page Range” in the context menu.

You can convert all pages of PDF file through “All Pages” selection.
If you want to convert some of them, select “Specified Page Range” and customize page range in text boxes.
Step 3. Set Output Path.
You can save the output text file in the same folder with the source PDF file.
There is also an extra option, where you can determine where to save your exported files.

Step 4. OCR PDF to Text.
After setting everything as you want, hit the “Start” button to start the OCR PDF to Text conversion. A prompt dialog will pop up after the conversion is done.


Part 2. How to recognize text from images with free OCR program.
Free download All PDF Converter Pro on Windows PC. Once the download is done, run the installer and follow the onscreen prompts to install the program.
After installing the program, you can launch it by double-clicking on short-cut icon.
Complete the following 3 steps to OCR images and turn them into digital text.
Step 1. Add Image file.
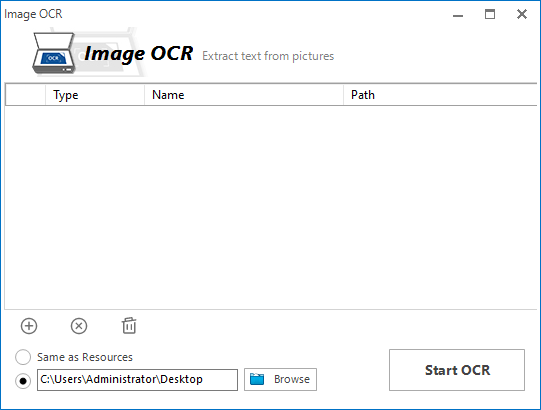
Select “Image OCR” in the sidebar. Then, a window will pop up that allows you to jump straight into what you want to do.
![]()
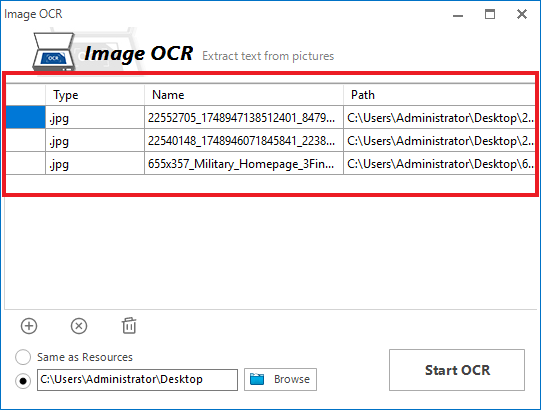
Click on the “Add” button to import the image files into the program. The image file extensions can be JPG, JPEG, PNG, BMP, TIFF, and GIFF.
![]()
You can also drag and drop the files into the “Image OCR” window.
Tip: Batch adding files is doable.
Once the files are added, you will see them listed in the “Image OCR” window.
Step 2. Set Output Directory.
You can choose “Same as Resource” if you want the output file to be saved in the same folder with the source file.
You also can specify a new location you want to save your new files.

Step 3. Start OCR.
When everything is OK, click on “Start OCR” to run OCR on images. This OCR program will start recognizing the text from images and exporting them as editable text files. The conversion will end with a prompt dialog.

Now, you are clear about how to OCR documents with All PDF Converter on Windows.
This free OCR software is a simple utility that facilitates the conversions from scanned PDFs to text and helps you extract text content from popular image formats. This makes it easy to perform editing, searching and copying just the same way you would with full-fledged digital documents. So, give it a try. I bet you will choose it as your preferred document productivity solution.