(Last Updated On: February 24, 2018)
PDF is the best format for document storage, for it transcends the boundaries of platforms. But there is a source of worry. Documents saved in PDF could rapidly eat up hard disk space. A PDF file will get humongous as things keep being involved in. So, if some elements are considered to be unnecessary, you can remove them to reduce PDF size. It is acknowledged that a PDF does not offer the option to eliminate anything from it. But don’t worry. There is always a way. This article will give you two solid methods to reduce size of PDF by removing unwanted objects
Method 1. How to reduce PDF file size with PDF Compressor V3.
PDF Compressor V3 is a fast and handy PDF size reducer specifically for Windows users. This simple utility is utilized to delete needless items wrapped in PDFs and free up space on the hard drive or flash drive. By batch erasing what you think is useless, it will create a PDF with significantly reduced size and acceptable quality. You are allowed to erase annotations, fonts, bookmarks, attachments, unused streams and objects not referenced on all pages. What’s more, this PDF shrinking helper does not come equipped with complicated functions or settings. So even an inexperienced user would soon figure out how it works. Let’s find out how to use this program to compress your PDFs step by step.
Step 1. Download and Install PDF Compressor V3.
PDF Compressor V3 is a free piece of software. So you can free download it on your windows computers by clicking on the download button below.

Run the installer and then installing only takes a few seconds.
Step 2. Run PDF Compressor V3 and Import Files.
Launch the program through a quick-start icon. Then, a regular window with intuitive layout will jump into your sight.
In the window’s upper-left corner is the “File” button.
Click on “File”> “Add File(s)” and then choose the file and open it.
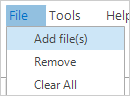
You can also click on “Add File(s)”, navigate the file and upload it.
![]()
The most direct way to import file is to drag and drop the file onto the workspace.
Tip: PDF Compressor V3 supports batch process. Therefore, you can import more than one file into the program at the same time.
Step 3. Configure Settings and Define Saving Directory.
There is a “Tools” button next to the “File” button.
Click on “Tools”, then “Settings”. You will come to the compression settings panel.
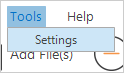
Clicking on the “Settings” button will produce the same result.
![]()
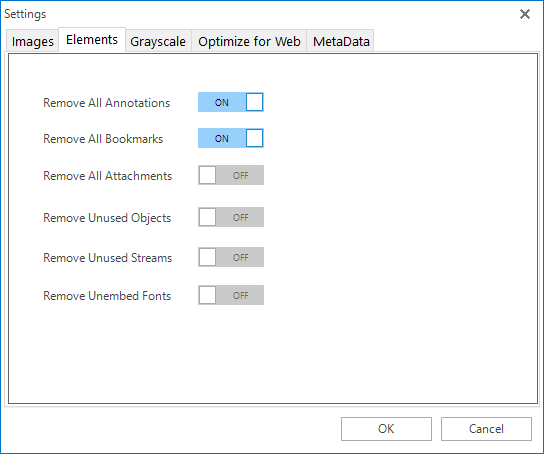
On the setting panel, go to the “Elements” tab.
If you toggle on a particular option, the corresponding function to remove the unwanted object will be activated.
After the settings, please click on “OK” to apply the settings.
This program allows you to choose the saving directory same as source or different.
You can keep the default setting to save the output file in the source folder.
You also can specify a new output location through path bar or browse dialog.

Step 4. Start Compression.
Pressing the “Compress” button will start the compression. The process will be completed in a moment.

Method 2. How to Reduce PDF Size with Adobe Acrobat Pro DC.
As is known to all, Adobe Acrobat Pro DC provides you great control in handling your PDFs. This application makes it possible to decrease PDF size by discarding unused data. Below is the tutorial on how to shrink PDF with it.
There is a tool within this application named “PDF Optimizer”, This tool enables you to optimize your PDF by configuring advanced options.
First, open the PDF in Acrobat.
Second, click on “File”, then “Saved as Other” and select “Optimized PDF”.
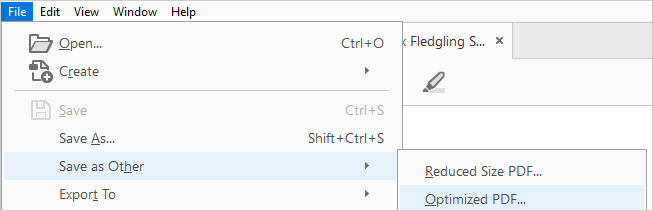
The “PDF Optimizer” panel will appear.
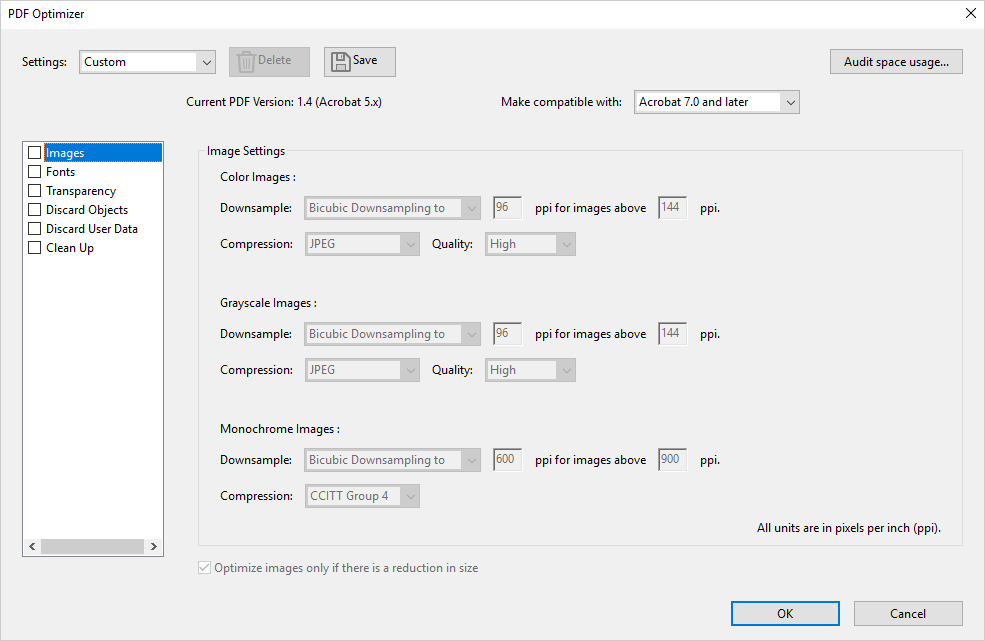
Here, “Fonts”, “Discard Objects”, “Discard User Data” and “Clean Up” are available for you to choose to wipe off various things from your PDF.
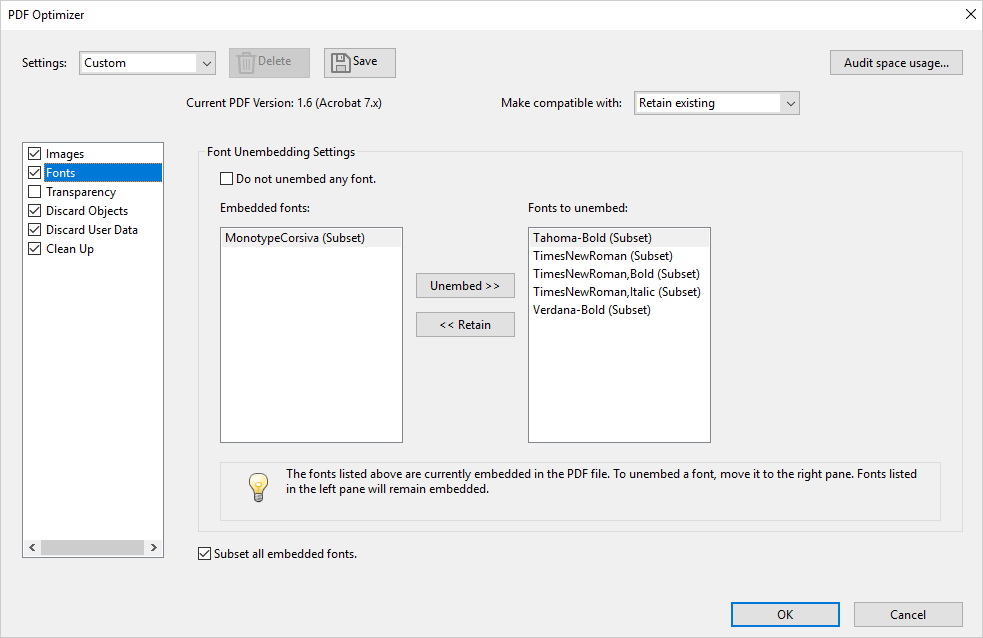
Fonts.
Here, you can unembed the fonts currently embedded in the PDF file.
Choose the embedded font in the left pane, click on “Unembed”, then it will move it to the right pane as one to unembed.
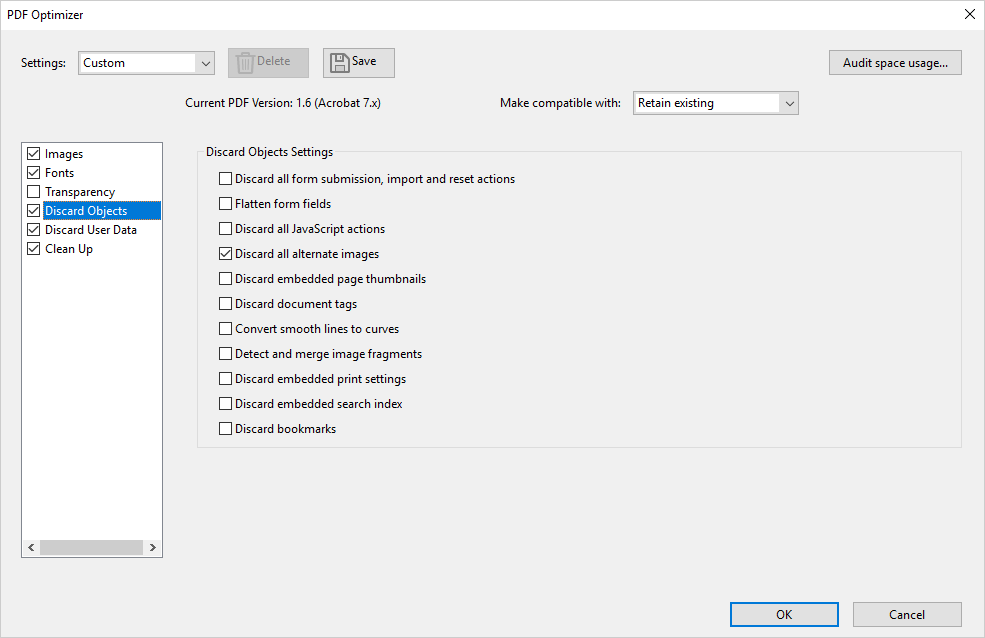
Discard Objects.
This panel allows you to determine what objects to remove PDF. Select an object and all occurrences of that object within PDF will be removed.
In this area, you can select objects to be removed by checking the boxes.
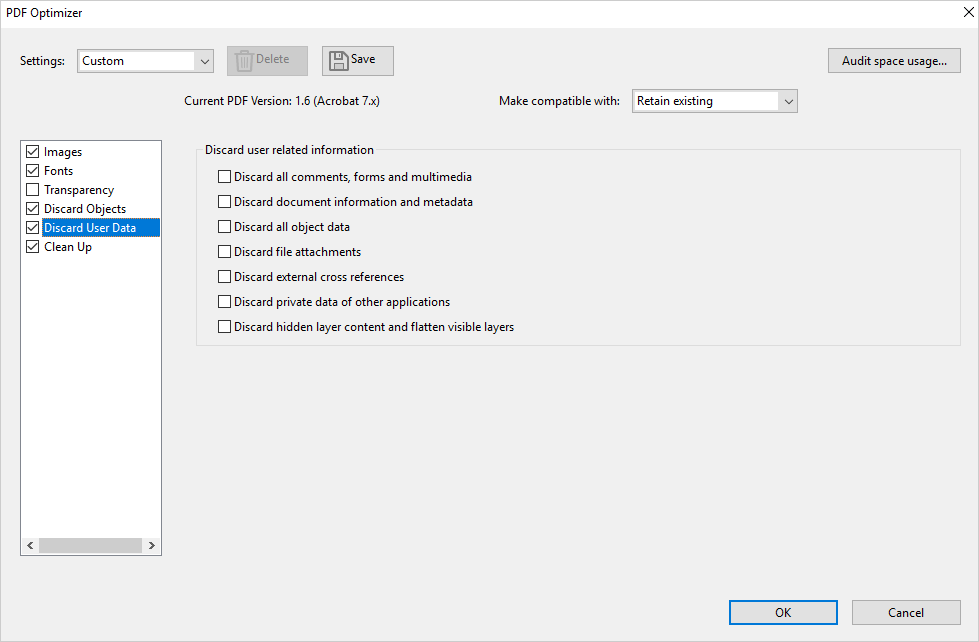
Discard User Data.
Using this function can help you remove any user information.
Check the boxes and you will have the options enabled.
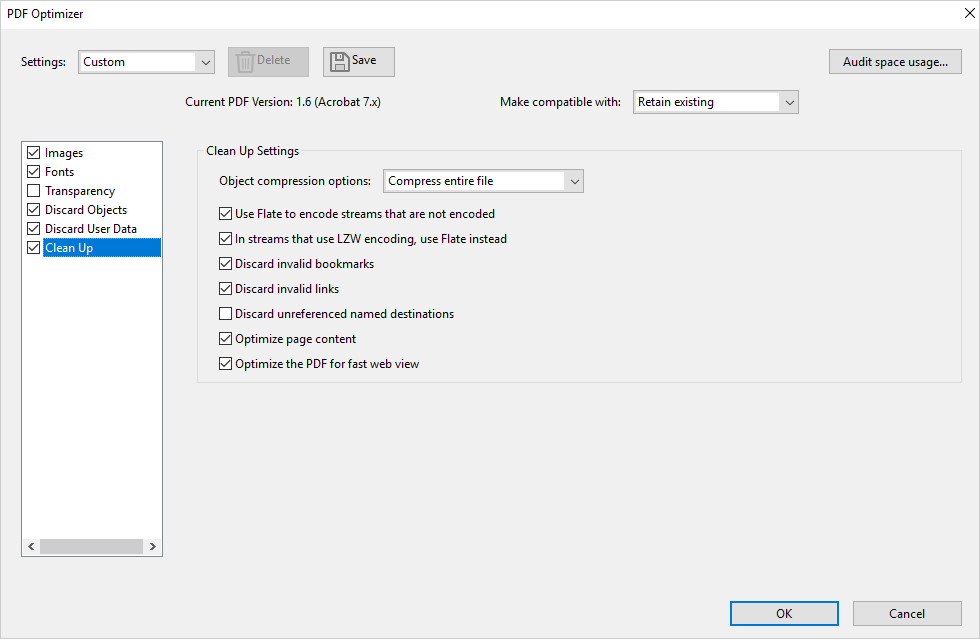
Clean Up.
The options here allow you to remove obsolete items from PDF documents.
To enable a particular option, check the corresponding box.
When you’re finished deploying settings, click on “OK”. In the “Save Optimized As” dialog, click on “Save” to overwrite the original file or choose an output folder to create a new file.
Now, you know how to get rid of unnecessary objects from PDFs and shrink them to smallest possible size. With either of the two methods above, you can clean up your PDF documents and streamline them with only relevant information.